Silent Hill 2 Walkthrough : Exploring the Dual Worlds
October 9, 2024 11:53 am
Silent Hill 2 is not just a horror game; it’s a deep dive into the human psyche. Simply beating the game is no longer the primary goal. In this walkthrough, players navigate an intertwined dual world: one that resembles a fog-covered small town, and another that’s a dark, nightmarish realm filled with grotesque creatures. These two worlds alternate throughout the game, making it hard to distinguish reality from illusion.
Start by walking along the path until you reach the cemetery, where you’ll encounter Angela searching for something. This meeting foreshadows your journey into the town.
After entering the town, head to the intersection of Lindsey Street and Sanders Street, where you’ll notice a long trail of blood on the ground. Follow the blood trail to the end of Vachss Road to find a steel pipe and a radio. At the end of Martin Street, you’ll discover a corpse with the key to Wood Side Apartments.
Upon entering Wood Side Apartments, grab the map from the bulletin board in the first-floor lobby. In Room 205 on the second floor, you’ll find a flashlight. Head up to the third floor, where you’ll spot a key behind some bars. Just as James tries to reach it, a little girl named
Laura kicks it away.
In Room 301, you can find a handgun in a shopping cart. Retrieve the key to Room 202 from the cabinet in Room 208 on the second floor. Inside Room 202, there’s a hole in the wall where you can obtain the clock key. Set the clock to 9:10 and push it aside to reveal a passage leading to Room 209. Ascend the stairs to the third floor to retrieve the “Fire Escape Key” that Laura kicked away. Enter Room 307, where you’ll encounter Pyramid Head. James hides in a closet, and after Pyramid Head leaves, you can pick up the courtyard key from where you were hiding.
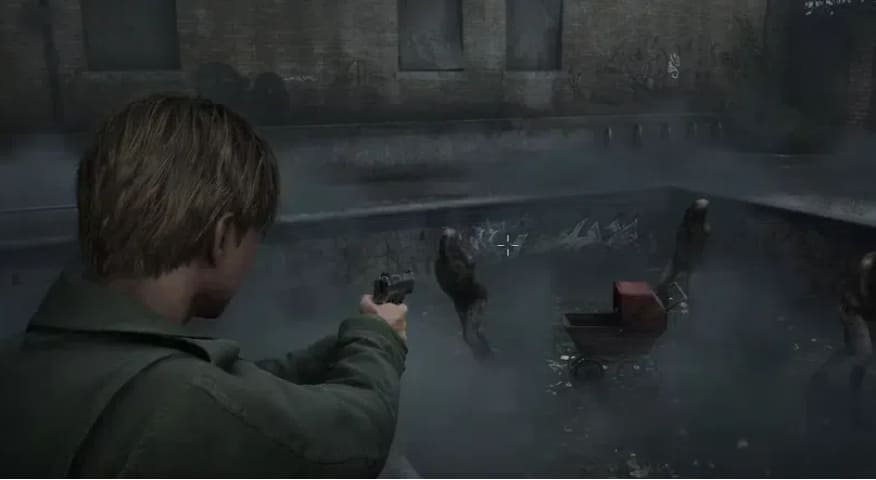
From the third floor, descend the right-hand stairwell to the first floor. Outside Room 107, you can find a can of juice. Return to the second-floor laundry room and use the juice to knock down a blockage. Head to the first-floor trash collection area to obtain the “Old Man Coin.” In the courtyard pool, you’ll find the “Snake Coin” in a shopping cart. Open the fire escape door on the second floor to discover that it leads to Blue Creek Apartments. In the bathroom, you’ll find a note with a combination for a safe (the password may vary). Open the safe to get ammunition. Exit the room and follow the Exit signs to find a map in the hallway. In Room 109, you’ll meet Angela again and receive the “Knife” and “Prisoner Coin.”
In Room 105, there’s a puzzle involving a five-hole table. Place the three coins correctly to get the key to Room 209. From Room 209, exit and head to the upper stairwell to fight Pyramid Head again.
At the lake, you’ll meet Maria, who insists on accompanying James. At the intersection of Nathan Avenue and Carroll Street, enter the bowling alley. Inside, you’ll encounter Eddie and Laura. Laura runs off through a side passage. Follow her to the back door of a nightclub, then through the nightclub to find Laura entering Brookhaven Hospital on Carroll Street.
At the hospital entrance, grab the map from the wall. In the document room next to the reception, find the Purple Bull Key near the typewriter. On the second floor, get the examination room key from the men’s locker room. In the women’s locker room, find a teddy bear with a bent pin and a shotgun in the closet. In Room M2, collect the Lapis Eye Key. Use the examination room key to access the doctor’s lounge, where you’ll find the code for the locked box in Room S14 on the third floor.
Open the box to get a piece of hair. Combine the hair with the hook to retrieve the elevator key from the shower room on the second floor. Use the key to reach the basement, where you’ll find the copper ring. In the second-floor lounge, open the box to get the lead ring. Return to the third floor and place both rings on the hand-shaped door to unlock it. The elevator takes you to the first floor, where you find a map and the hospital key. Follow the tunnel to the east side and find a letter mentioning a key behind a statue in the park.
After exiting the small dark room, open a hatch and continue jumping down to reach the prison cafeteria. Collect the first card in the cafeteria, the second card in the shower room, and the wax doll in the southern cell block. In the northern cell block, find the third card. Head to the gallows in the right courtyard and place the three cards in the noose. As you return, you’ll find a magnet on the door. In the visitation room, pick up a lighter and a rifle in the adjacent room. Open the hatch in the basement and enter the morgue. After another jump, you’ll find yourself in an elevator.
In the labyrinth, you’ll encounter a room with a rotating cube. Align the cube correctly to reveal a passage. Nearby, you’ll find a pair of bolt cutters. In one room, you’ll witness Angela being attacked by a monster. Continue forward to find a room with six hanging corpses and another room with six ropes. Pull the correct rope to retrieve a key. Exit the room and head to the graveyard. Jump into the grave marked with James’s name to reach the freezer.
After exiting the freezer, head to the pier and take the boat to the Lakeview Hotel. On the second floor, open the suitcase in the cloakroom to get the key to Room 204. In Room 204, retrieve the employee elevator key from the table. In the office, locate the videotape and a can opener inside the safe. Finally, in the pantry, obtain the Snow White music box.Return to the first-floor lobby and get the key to the third floor. Enter Room 312 and watch the videotape to reveal the truth about Mary. James recalls that he killed Mary himself, not her illness.
After the revelation, the hotel transforms into its nightmare version. Head to the basement to find the bar and pick up the Cinderella music box. In the reading room, you’ll find the Little Mermaid music box. Place all three music boxes on the first-floor music box stand to unlock the door to the lobby. In the lobby, head to the elevator to reach the basement again. In the basement, you’ll find Maria being executed by Pyramid Head. This time, there are two Pyramid Heads to fight. Use your rifle to defeat them. After the battle, they will take their own lives, leaving behind the Rust-Colored Egg and the Scarlet Egg.Use these eggs to unlock the final door.
Enter the final area to face the last boss, which is a manifestation of Mary’s illness and your guilt. Use everything you’ve learned and all the weapons you’ve gathered to defeat her. After the battle, you’ll watch the ending cutscene, which varies depending on your actions throughout the game.
Silent Hill 2 has multiple endings based on your in-game behavior:
- Leave Ending: James accepts his guilt and decides to leave Silent Hill, hoping to start anew.
- In Water Ending: Overcome with grief, James decides to end his life by driving into the lake.
- Maria Ending: James chooses to stay with Maria, who starts to show symptoms similar to Mary’s illness.
- Rebirth Ending: James plans to resurrect Mary using occult rituals.

Silent Hill 2 is a masterpiece of psychological horror. This guide helps you navigate its foggy streets and nightmarish realms, uncovering its dark secrets one step at a time. Enjoy the journey and brace yourself for the unexpected.