Strategies for Unlocking the Echoes of Wisdom Lanayru Temple
October 24, 2024 12:17 pm
The Hebra Mountains and the Sacred Mountain Lanayru in “
The Legend of Zelda: Echoes of Wisdom” are some of the most desolate and challenging areas in the game. Nestled within the stillness of the Lanayru Sacred Mountain Gorge lies the Lanayru Temple, an essential part of the main story quest. This guide will walk you through the entire Lanayru Temple, ensuring you don’t miss any crucial steps, treasures, or secrets.
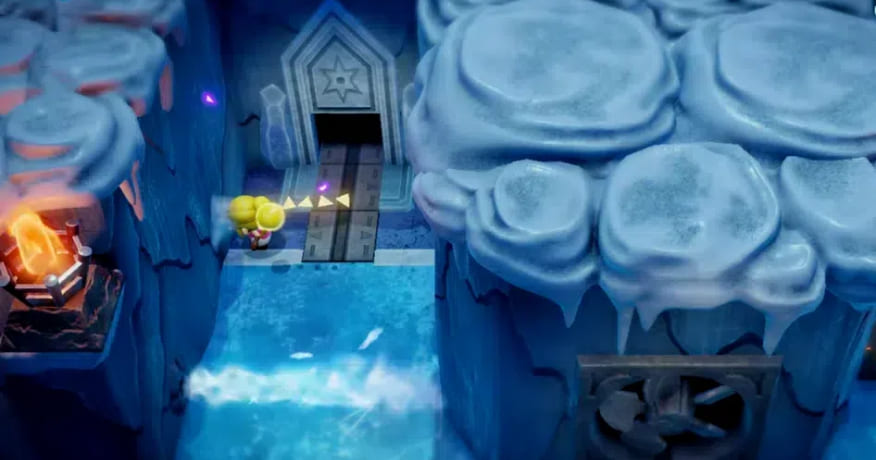
Upon entering the Lanayru Temple, a captivating cutscene will play, showcasing ancient murals on the walls that hint at the temple’s rich history. After the cutscene, head to the temple entrance. Interact with the teleportation point and melt the ice block in the upper left corner to obtain a Twisted Pumpkin. This item is essential for progressing through the temple, and it sets the stage for the puzzles and challenges ahead.
Begin your journey by heading to the left room. Here, you will encounter an Ice Octopus. Use your combat skills to take it down, and you will be rewarded with a chest containing five pieces of Rock Salt. This early reward is a small taste of the treasures that await you in the temple. Return to the temple entrance and prepare to tackle the right room, where the first major puzzle of the dungeon awaits.
The main objective in this room is to transport a fireball from the right side to the pedestal on the left side. This may sound simple, but it requires careful planning and execution. Once the pedestal is activated, it will turn on the heater in the adjacent room, melting all the ice and revealing new paths. Return to the room with the heater and climb down the now accessible ladder. Along the way, you will encounter Yeti enemies. Use your combat prowess to defeat them and proceed.
At the second Yeti, you need to build a structure tall enough to use the Strandula Echo to reach the chest above. This chest contains three Monster Fangs, a valuable resource for crafting and upgrades. Continue down the ladder and encounter another common dungeon theme: blocking ice holes with boulders. Use your binding ability to drag boulders and block the ice holes, then proceed to the next room.
In the next room, use a boulder to block the ice outlet on the left side. Hold the Y button to use the boulder to block the outlet, allowing Tri to pass it through the fence. Now, use Tri to pick up the fireball and place it on the pedestal, melting all the ice in the previous room. This puzzle requires precise timing and coordination, but the reward is worth the effort.
Return to the left side, dive into the water, and pick up a Small Key. Now, head back to the room with the fireball. Use Tri to pick it up and drag it through the ice hole, transforming it into an ice ball. Return to the room with the fan, head to the right side, and use boulders to build a staircase while blocking the fire outlet. Equip the Frog Ring accessory to easily climb these boulders. Open the door and descend the ladder to enter a 2D sequence.
In this sequence, falling ice pillars will block the ice vents. Quickly use Tri to grab the ice pillars, preventing them from falling, and use them to block the cold air while climbing. Carefully navigate through the first gap when the ice vent is closed. On the right side of the first vent, use water blocks to lift yourself directly up to a room with a chest containing a Golden Egg. For the second set of vents, cleverly place some water blocks to bypass them.
In the next room, move the ice block in the upper right to reveal a ladder. Climb down. In this 2D area, you will see another ice block. At the bottom of this area, use Tri to grab the fireball and carefully lift it without letting it touch the cold air. To do this, place three water blocks below so you can move the fireball to the left and bypass the ice vent in the upper right. Place the sphere on the pedestal, then return to the ladder and enter the room on the left.
To activate the switches, you need to press them simultaneously. Push the ice block onto the right switch, then quickly summon an Ice Block Echo to the left switch, pressing both switches at the same time. This will reveal a chest containing a Small Key. Take the key, return to the previous room, and enter the left door. You will find yourself trapped in a room with four grumpy enemies. Defeat them to reveal a chest containing the dungeon map. With the map in hand, navigating the remaining parts of the temple will become significantly easier.
Skorchill is the formidable boss guarding the Lanayru Temple. This icy behemoth will challenge your skills and strategy. Skorchill will raise its arms and slam them down, giving you an opportunity to attack its helmet from melee range. Watch for shadows on the ground to successfully dodge each attack. You need to use fire stones to break the three ice nodes on its head. You can also pick up a Fire Basin Echo and jump up to hit the fire into its helmet, but fire stones are the most effective.
Once you’ve broken Skorchill’s ice nodes, it will become more vulnerable. This is your chance to unleash a barrage of attacks. You can use your sword or any other powerful weapon to deal significant damage. Be cautious, as Skorchill will become more aggressive once its helmet is broken. Keep moving and dodging its attacks while looking for openings to strike.
In the final phase of the battle, Skorchill will start using more unpredictable attacks. Stay alert and use your dodging skills to avoid its powerful slams and ice-based attacks. Continue using fire stones to keep breaking any new ice nodes that form. Once you’ve dealt enough damage, Skorchill will be defeated, and you will be rewarded with valuable loot and the satisfaction of conquering one of the most challenging bosses in the game.
The Lanayru Temple in “The Legend of Zelda: Echoes of Wisdom” is a test of your puzzle-solving abilities, combat skills, and strategic thinking. By following this guide, you can navigate through the temple, solve its intricate puzzles, and defeat the formidable Skorchill. As you explore, keep an eye out for the
Echoes of Wisdom Heart Pieces hidden throughout, as collecting these will greatly enhance your health. Remember to take your time, explore every nook and cranny, and make use of the unique abilities and items you acquire along the way.